TL;DR Simply, just add a RC circuit to the
RSTandGNDpins of your Arduino Ethernet Shield Clone. Resistor and Capacitor values are in the last chapter.
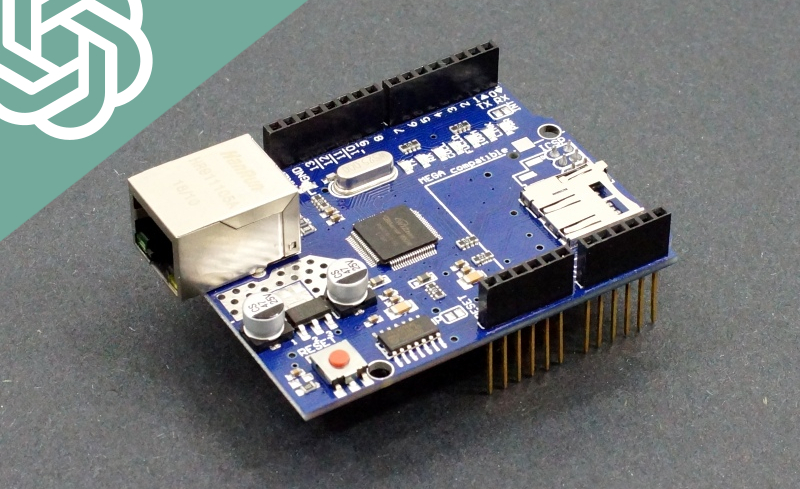
The Arduino Ethernet Shield is the perfect start point for beginner who want to explore network connectivity for their Arduino Projects. Its compatible with Arduino Uno and Arduino Mega. Unfortunately the original Arduino Ethernet Shield 2 prices are spicey, so many of us try to get hands on to cheaper alternatives.
A famous and cheaper alternative is the chinese Arduino Ethernet Shield Clone based on the W5100 chip. Compared to the ENC28J60 module, the W5x00 chip series have integrated TCP/IP Stack and work with the Arduino Ethernet Library. So what can go wrong?
Weird clone issues
After receiving a handful clones, the first thing I tried was my favorite MQTT library PubSubClient. My smarthome project worked flawlessly after refactoring the sourcecode. Previously I used the ENC28J60 module, that brought its own issues.
(More about my several Smarthome iterations soon.)
Successful TCP and UDP tests made me accept the clone shield as a perfect alternative to the original Arduino Ethernet Shield. I adapted it in every future IoT project: Smarthome appliance, Weather Stations, RFID Door Lock and credit systems and many more.
One day a friend reached out to me and wanted to control his rover via network. He requested a very simple replacement for his APM 2.x Ardupilot. Sure, this should be not a big deal. A cheap wireless router and an Arduino Uno + Clone Ethernet Shield would be the perfect choice.
In few days the project was ready to be tested on the field but to our disappointment, the rover was not very responsive and from the status LEDs we could already tell that something is not working as planned. There was no network activity. The problem was temporarily solved when we resetted the Arduino Uno.
Failed attempt #1 (Software)
Many people online had similar issues, but the key difference was that they used DHCP or connected the Ethernet Shield directly with their computer instead of using a switch or a router.
I tried to fix the issue via software. I spammed professionally every part of the sourcecode with the delay function hoping it will fix the issue. Clearly it must be something with the timing. Things got more frustrating, when sometimes it worked out and sometimes not.
Later I figured out that it was because my laptop was still connected. As soon as the USB cable was removed to the Arduino Uno and the setup running externally via the 5V or VIN pins, the problem occured again. This had te be due to the auto-reset function of the Arduino Uno that resetted the chips at the right time, when the Serial Monitor was opened for debugging.
Failed attempt #2 (Hardware)
After the software attempt didn’t work out, I tried to solder the cutted side of a male dupont cable to the RST pin of the W5100 chip. As you can guess, this didn’t work out either.
The idea was to reset the W5100 chip via digitalWrite function within the sketch after a given time by using delay or millis functions.1
Failed attempt #3 (Hardware)
Some users pointed out that the chinese clones use wrong resistors with the value (511) 510Ω instead of (510) 51Ω close to the ethernet jack.23 This can be easily fixed by replacing the SMD resistors or adding additionally two more resistors to match the right values. In our case this didn’t help us, too.
Working solution (Hardware)
 All the sleepless nights and pressure for the deadline overdue went immediately away, when we discoverd the extremly simple solution.
As me and my friend figured out earlier, the network connection worked perfecly fine when we manually resetted the Arduino Uno. By doing so the Ethernet Shields W5100 Chip resets aswell.
All we needed to do was to tigger once the RST pin externally by using a resistor-capacitor curcuit.45 When the Arduino board gets power on, the capacitor gets charged and resets the Arduino board. The timing can be adjusted by choosing different resistor and capacitor values.
We tried a 220µF capacitor and 200Ω resistor. 470µF and 10kΩ also worked perfectly fine. 47µF and 10kΩ also worked perfectly fine. What a relief!
Update
Twitter users pointed out that the values we used in the RC Circuit had to be wrong.67 I contacted my friend for confirmation and he told me that something was not correct. It turned out that I mistyped the capacitor value. The value had to be 47µF instead of 470µF.
Thanks to everybody who pointing it out.
We made a quick calcuation.8 My friend asked ChatGPT. Here are the results:
ChatGPT:
To determine the delay provided by a capacitor and resistor in parallel on a reset button, we need to calculate the time constant (τ) of the circuit. The time constant represents the time it takes for the capacitor to charge or discharge to approximately 63.2% of its maximum voltage.
The formula to calculate the time constant (τ) is as follows:
τ = R * C
Where: τ = Time constant (in seconds) R = Resistance (in ohms) C = Capacitance (in farads)
Given that the capacitance (C) is 470 μF (microfarads) and the resistance (R) is 10 kΩ (kilohms), we need to convert them to the appropriate units before calculation.
1 μF = 1 × 10^(-6) F (farads) 1 kΩ = 1 × 10^3 Ω (ohms)
Now we can substitute the values into the formula:
C = 470 × 10^(-6) F R = 10 × 10^3 Ω
τ = (10 × 10^3) Ω * (470 × 10^(-6)) F = 4.7 seconds
Therefore, the delay provided by the 470 μF capacitor and 10 kΩ resistor in parallel on the reset button is approximately 4.7 seconds.
Let’s see what ChatGPT says to the right values:
ChatGPT:
τ = (10 × 10^3) Ω * (47 × 10^(-6)) F = 0.47 seconds
Therefore, if you change the capacitor from 470 μF to 47 μF, the delay provided by the circuit will be approximately 0.47 seconds.
Impressive!